Creating Effective Real Estate Direct Mail Campaigns with Canva Templates
Who says direct mail is dead? As long as your real estate direct mail campaigns are effective and well-executed, they are an excellent addition to your marketing strategy.
Direct mailers for real estate must be eye-catching, informative, and not to sales-y. You can use them to provide housing market updates, community digest, cleaning checklists, dear neighbor letters, buyer’s or seller’s guide, and more.
Fortunately, Canva templates are easy to customize and require no professional design skills. To help you get started, we’ve prepared these easy steps for creating effective real estate direct mail campaigns. Specifically, we’ll teach you how to make beautiful direct mail postcards.
Step #1: Create a Canva Account
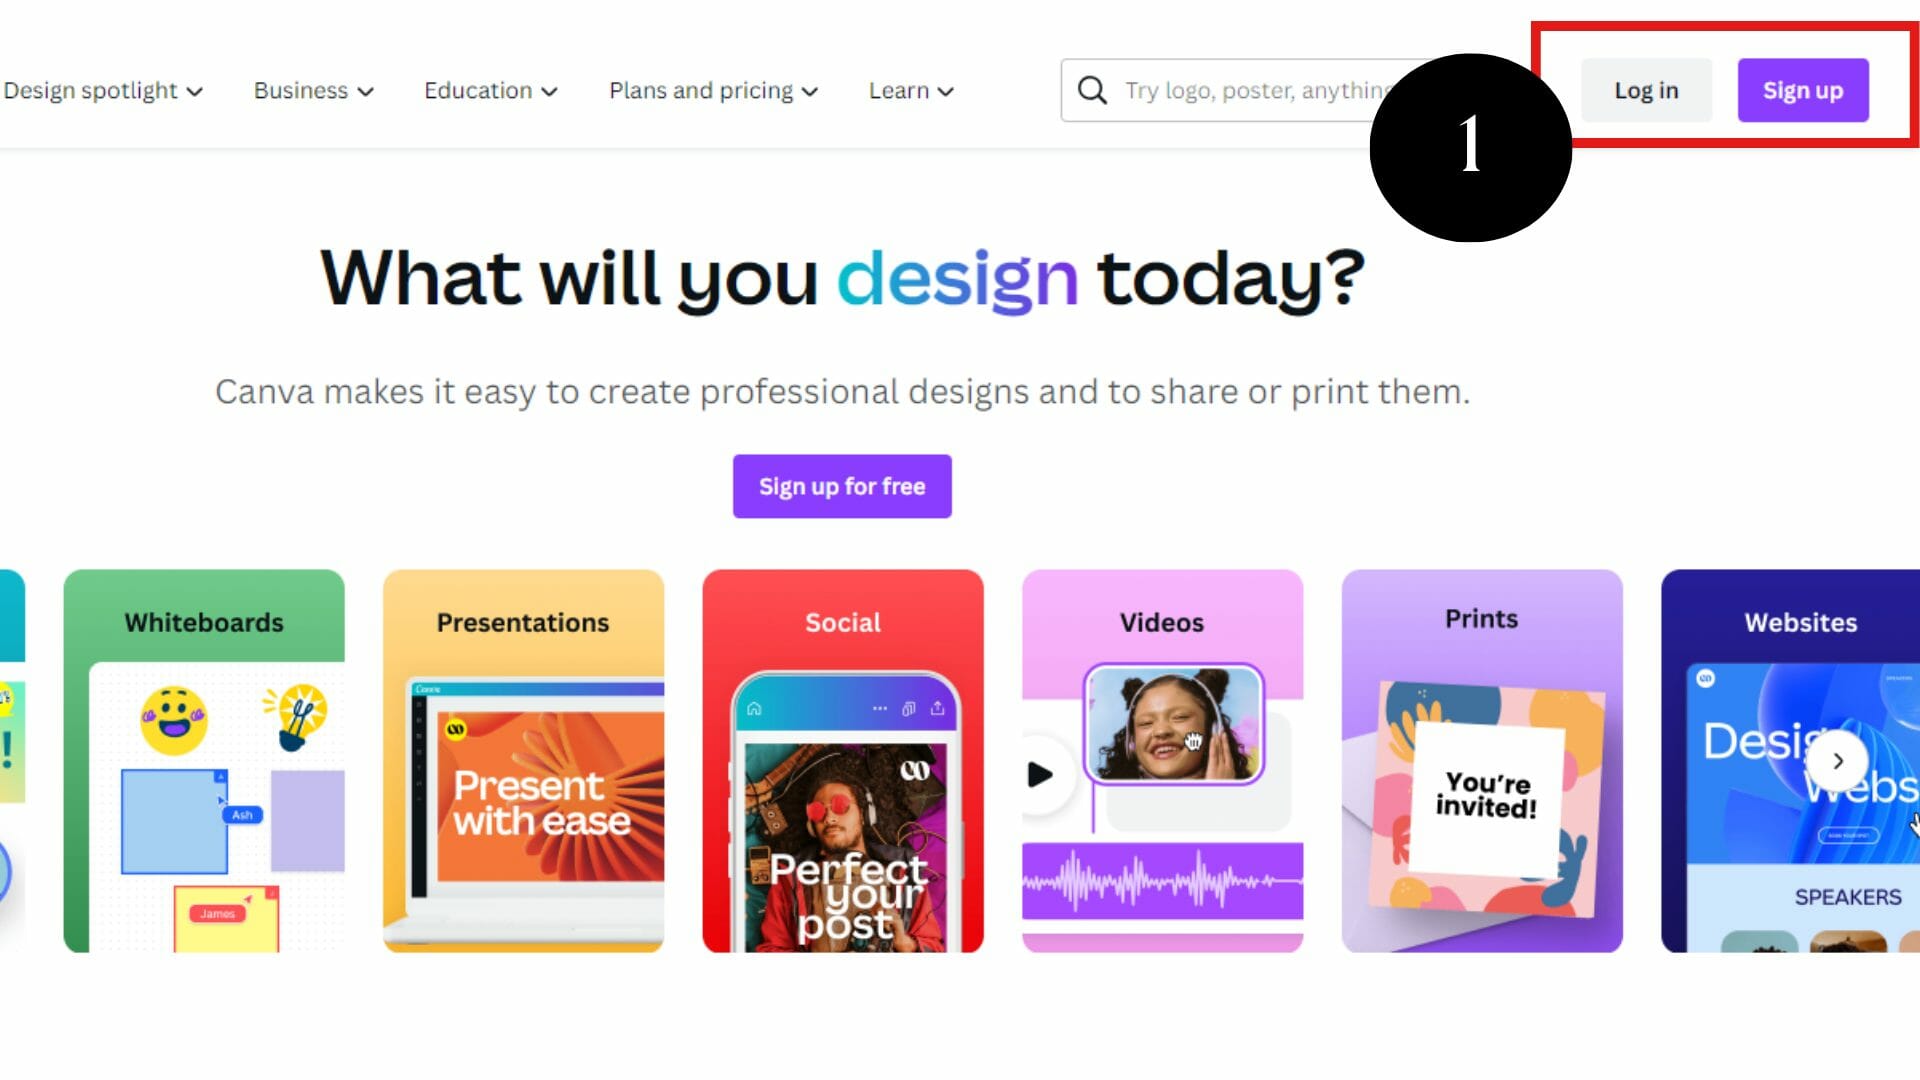
Visit Canva.com and create a free account. The free version provides access to templates and limited content. But if you want additional features like Background Remover, Unlimited Content, and Brand Kit, we recommend getting a premium plan.
Step #2: Select a Starter Template
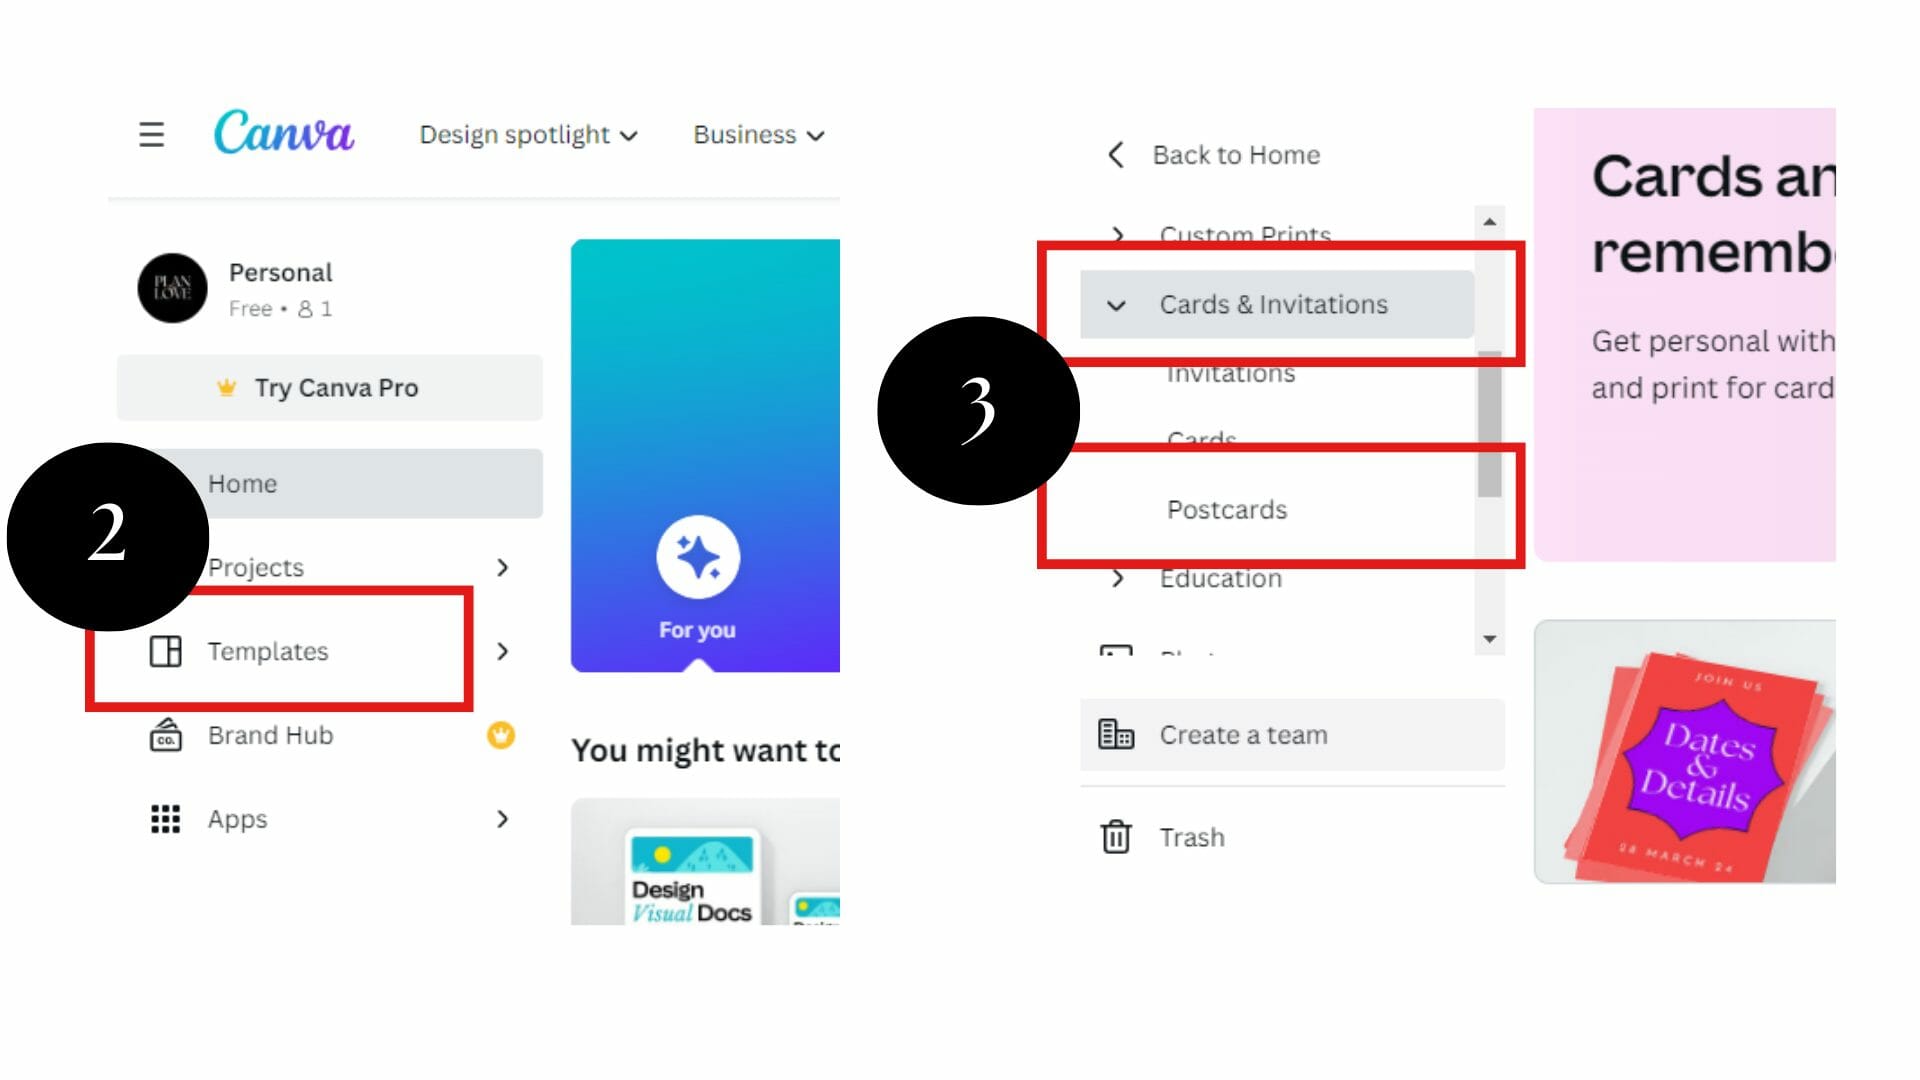
As mentioned, we’ll create a real estate direct mail postcard. Go to the left-side navigation menu, and click “Templates.” Then, select “Cards and Invitations” > “Postcard.”
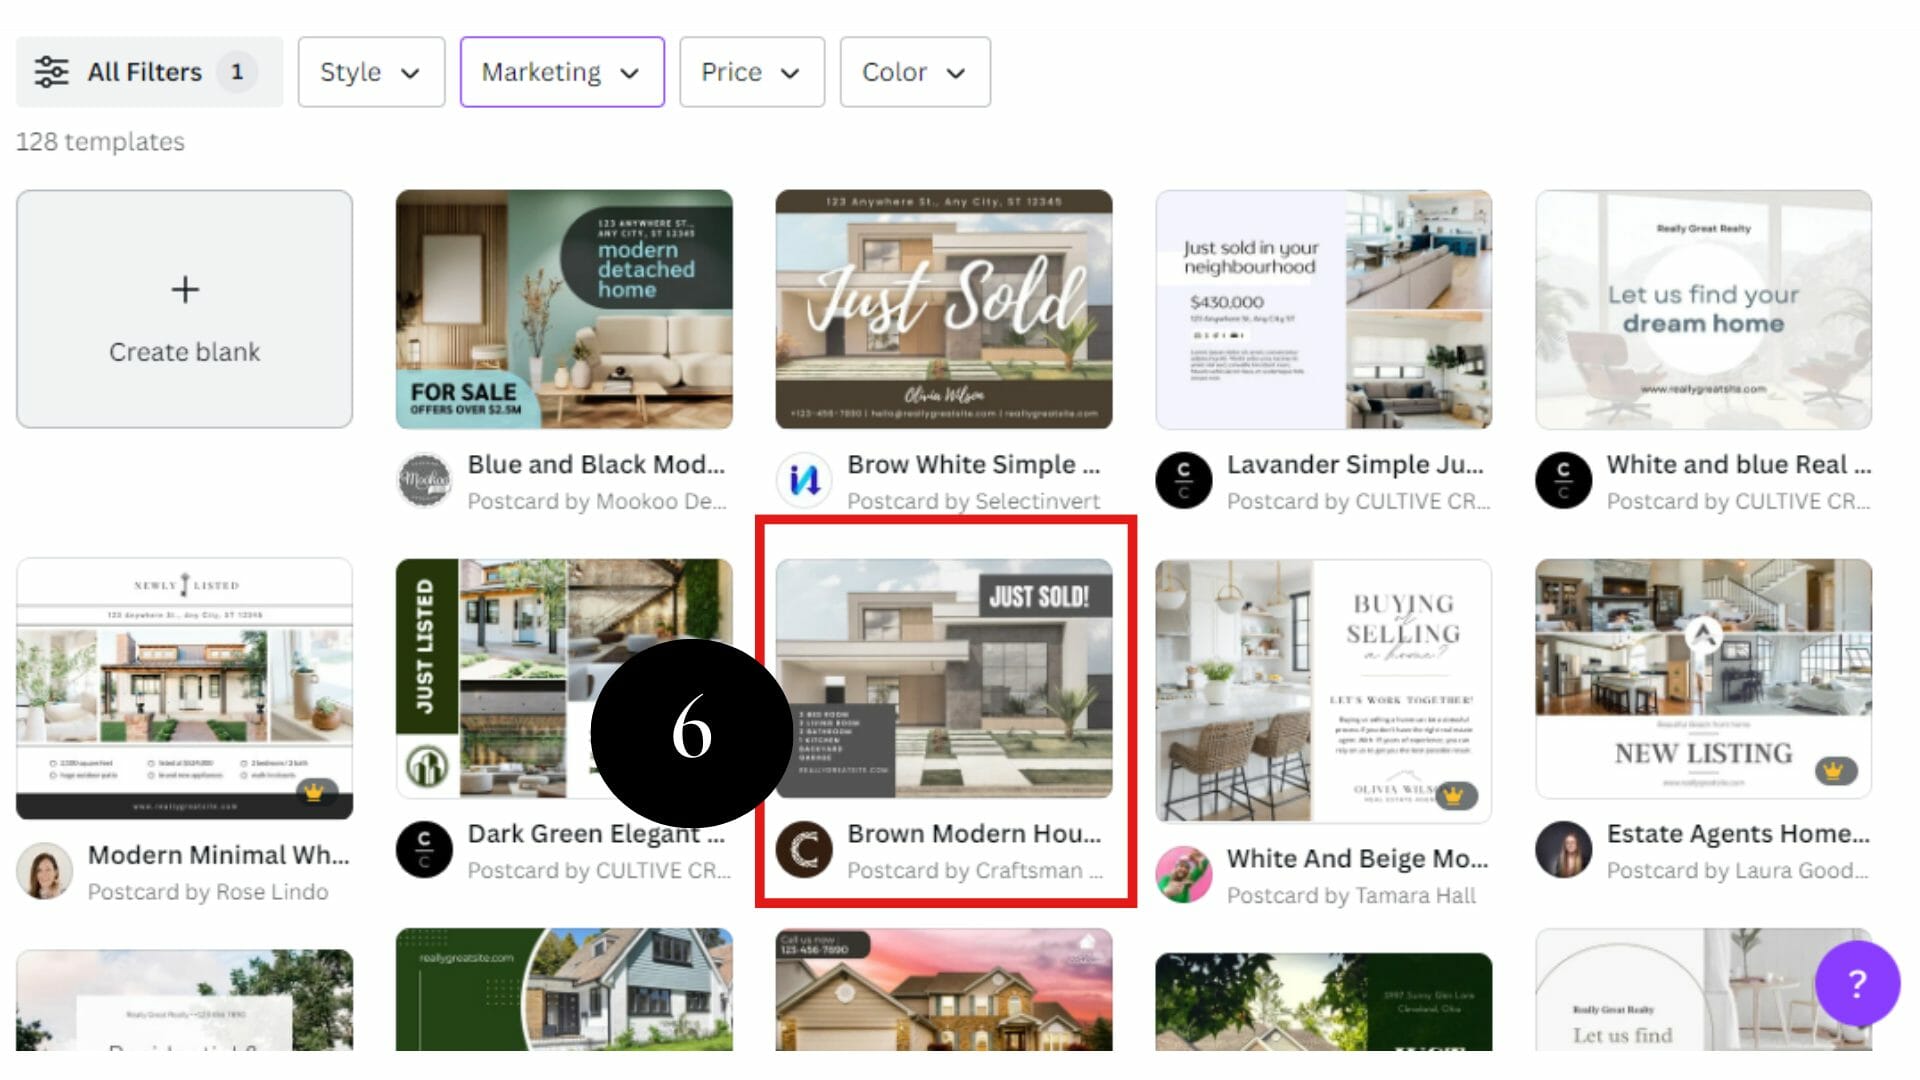
Now, explore various postcard options and choose what appeals to you the most. You can narrow down your search using the filter tool on the left-hand side by topics, subjects, features, themes, or styles.
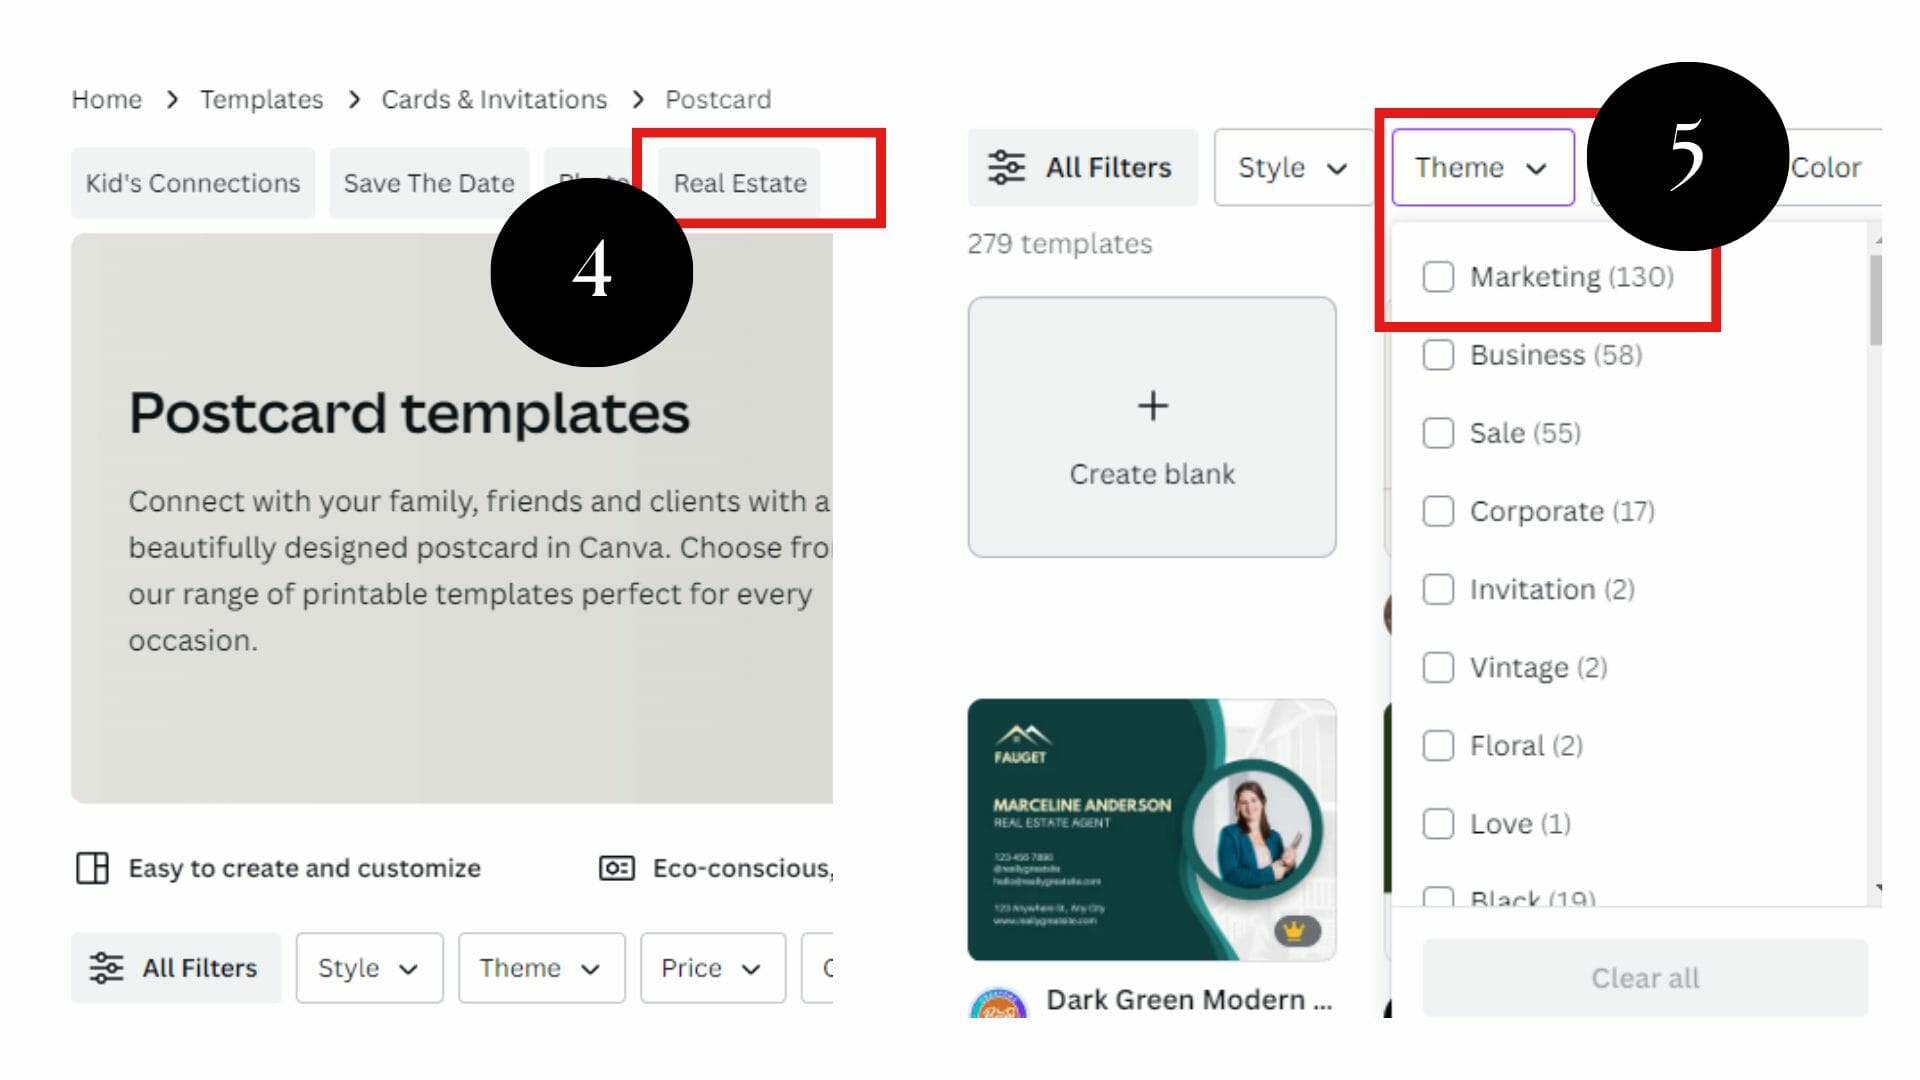
I used this example’s “Real Estate” category and “Marketing” theme filters.
Step #3: Customize the Template
Once you’ve selected your preferred template, click on it and choose “Customize this template.” While in the design workstation, customize your template by clicking the text boxes for text customization and using the right corners for size adjustments.

Moreover, incorporate your desired design elements. Go to the top left color icon to change the color. To create your template background, right-click and choose “Detach from Background.”
For premium version users, search for the preferred background image. But if you’re using the standard version, find your own and upload it using the copy + paste or upload button.
Step #4: Change or Add an Image

First, you must remove the current photo by clicking the area and then the delete button. Look for a specific image in the search bar on the “Elements” tab. For example, you can type “house.” Next, click and drag and drop the photo to the desired area. You can also use the photo of your listing. Right-click and select “Set image as background.”

Step #5: Add Text Effects
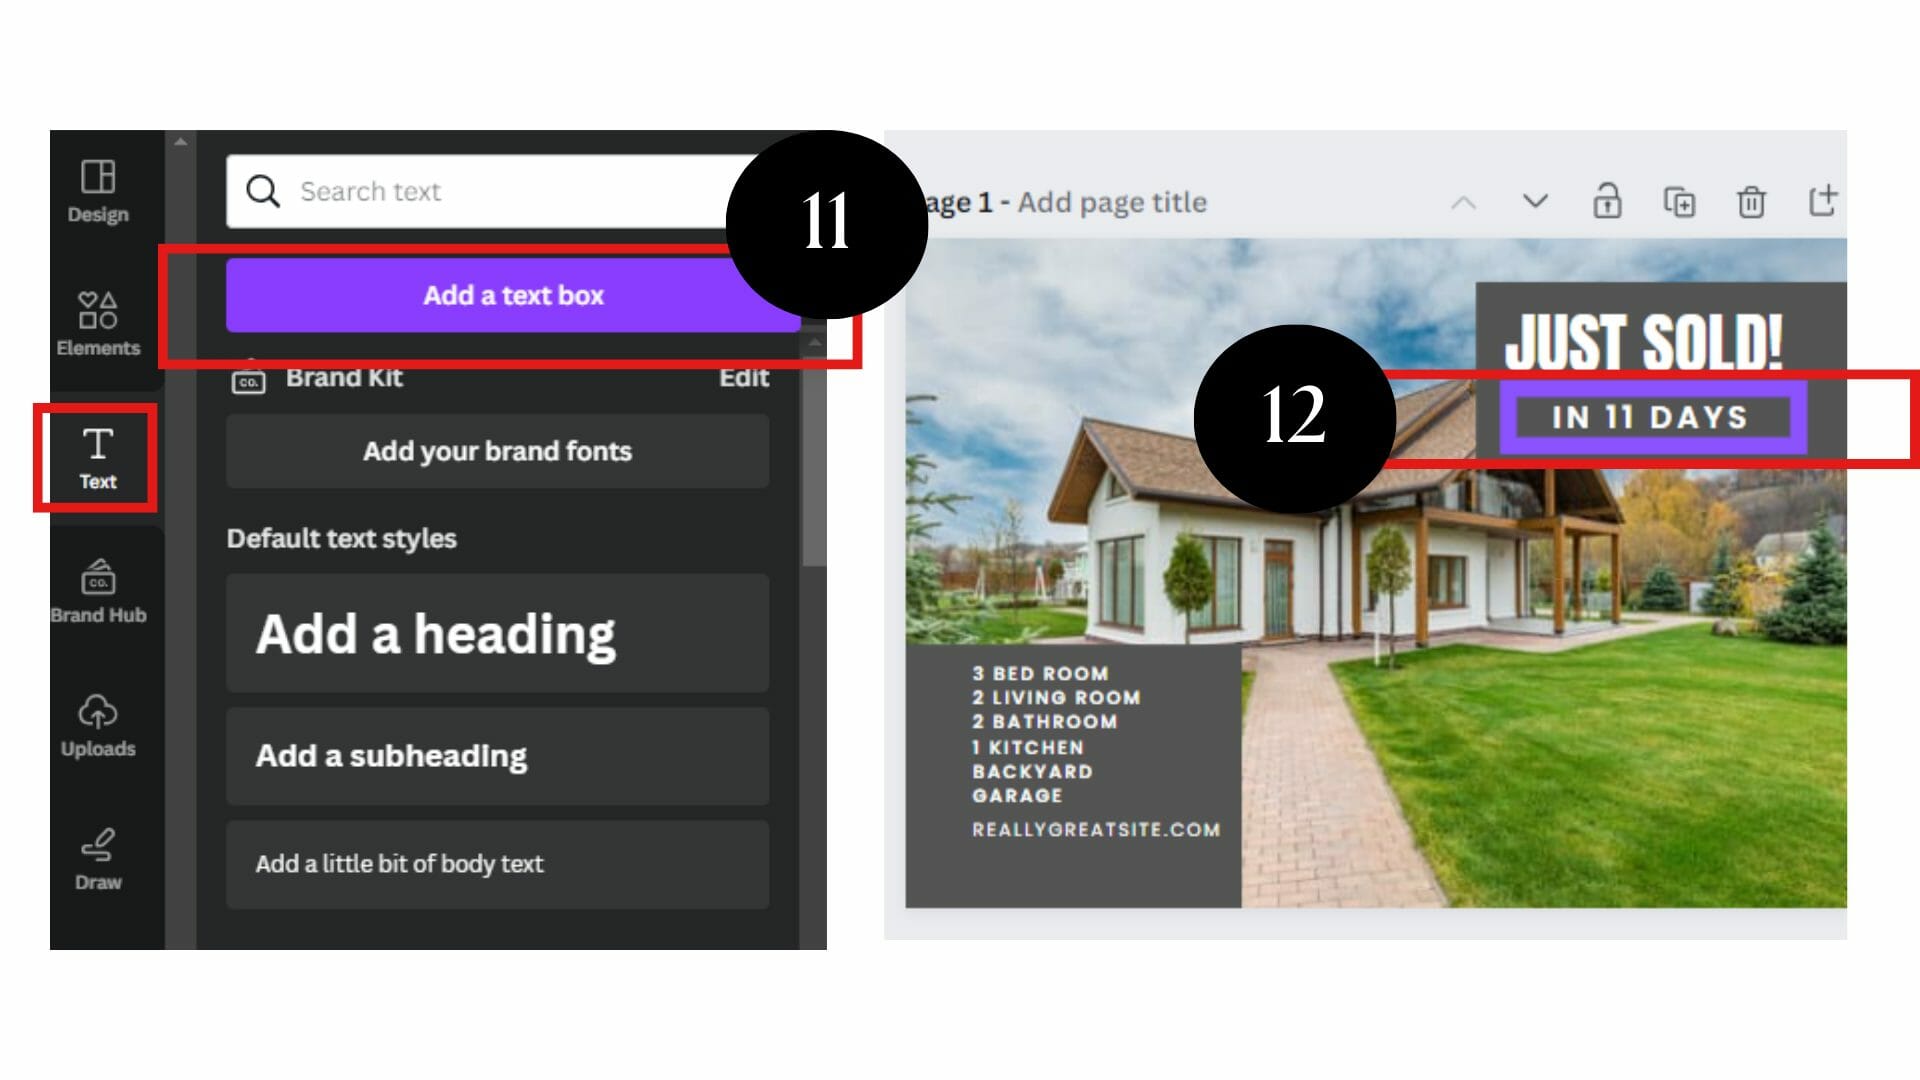
Feel free to experiment with your direct mail texts by changing the existing ones or adding new ones. You can make similar adjustments to the back postcard’s back side.
In this stage, you can include a clear CTA that tells recipients what action you want them to take next, such as “Visit our website for more details” or “Call now to schedule a showing.” Oftentimes, this template type has a second page for that. Using bold fonts and contrasting colors makes your CTA stand out.
Step #6: Save and Share
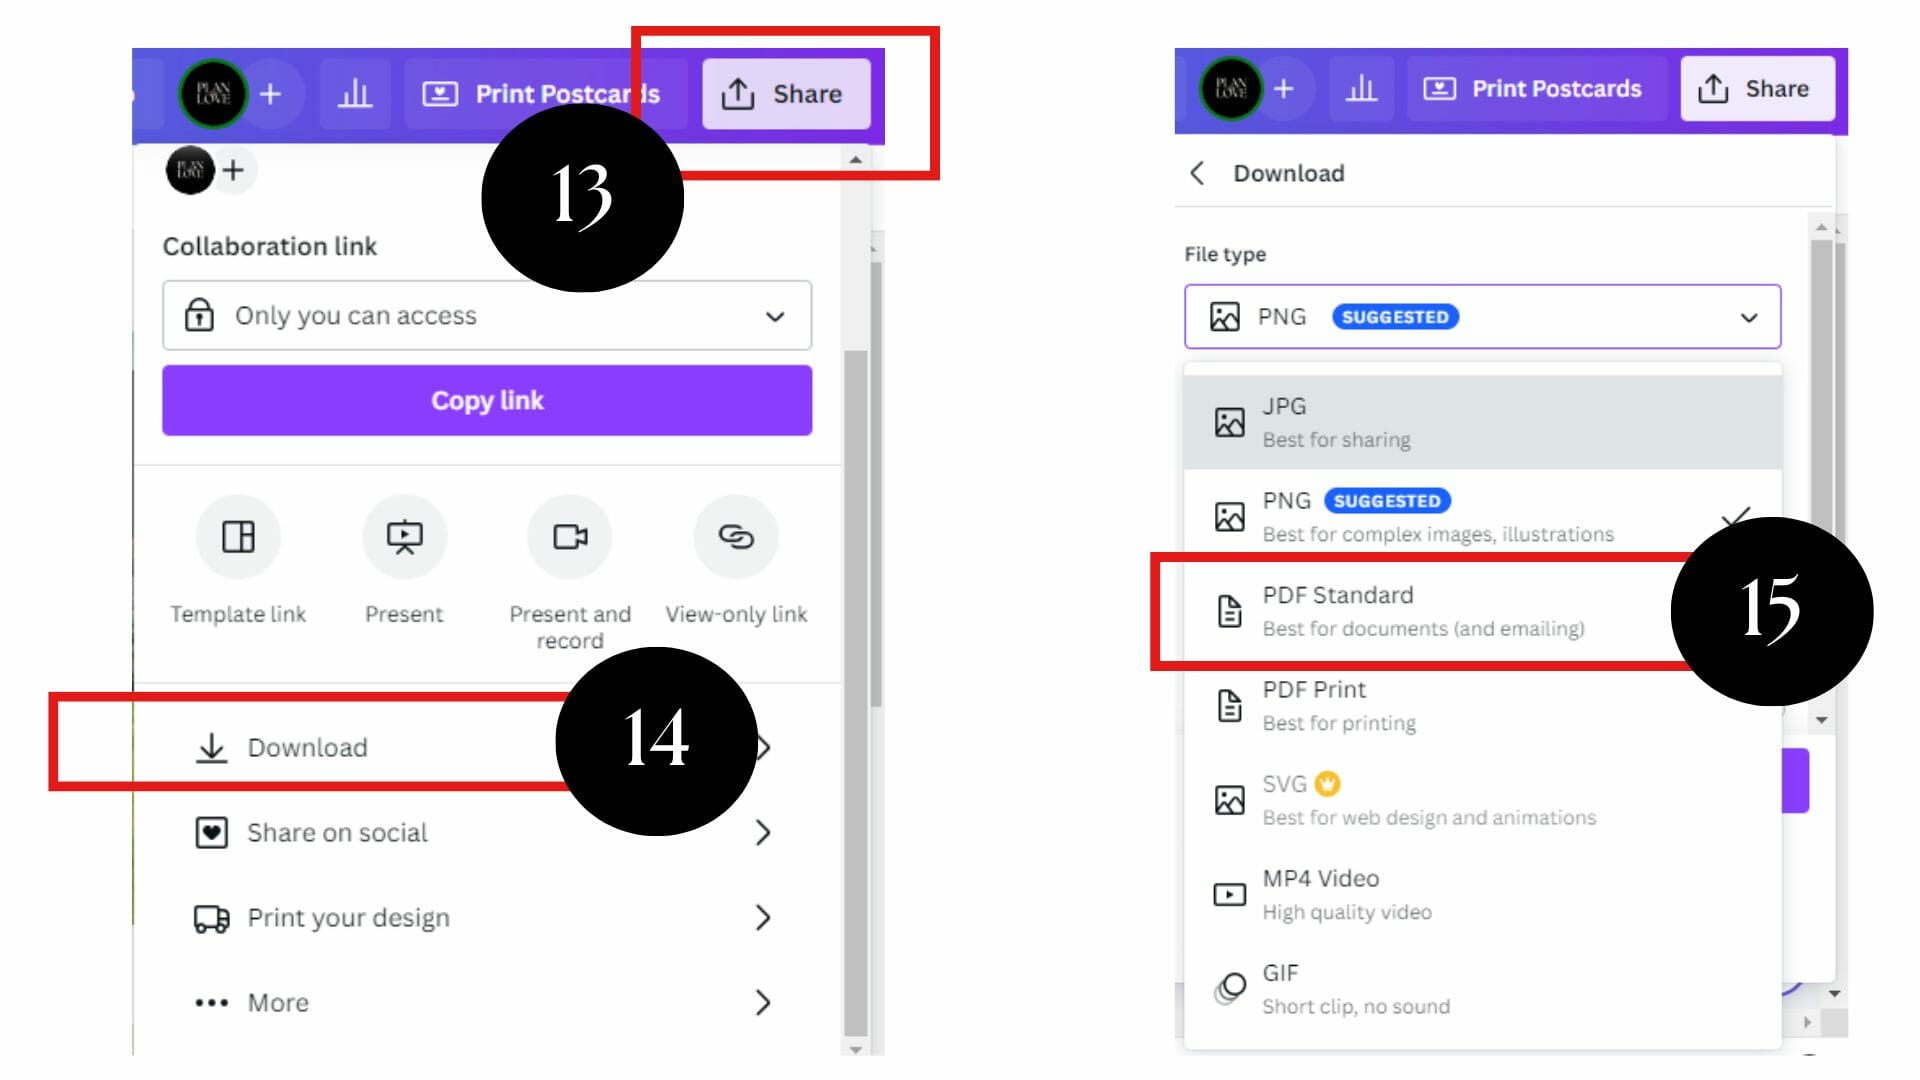
Once you’re happy with the direct mail postcard design and get it ready for printing or sending online, click the “Share” button and then “Download.” Also, give your file a name. Finally, save it to the designated folder on your device.
If you want to print the design home, we recommend the PDF format and select crop marks and bleed. But if you’ll send it via email, select JPG or PNG format.
Creating an effective real estate direct mail campaign is easier with Canva templates. You don’t need complex skills, follow the easy steps above and unleash your creativity. But if you wish to leverage your email marketing approach, Scale Up Agent has a team of professionals who will handle all your marketing needs.
References: